Hey there, fellow solar pump users—if you’ve got a solar submersible pump keeping your well, farm, or water feature running smoothly, you already know how game-changing these little workhorses are. As someone who’s spent the last five years selling and supporting these bad boys as a solar submersible pump supplier, I’ve seen way too many folks skip simple cleaning steps and end up with a pump that’s sputtering, not pumping. Today, I’m breaking down exactly how to clean yours the right way—no fancy tools, no confusing jargon, just solid, science-backed tips that’ll keep your pump running for years. Let’s dive in. Solar Submersible Pump

First off, let’s get one thing straight: cleaning a solar submersible pump isn’t like scrubbing your kitchen sink. It’s not about blasting it with chemicals; it’s about removing gunk that builds up where the pump’s actually doing its work—underwater, deep in your well, or at the intake screen. The number one mistake I see new owners make is pulling the pump out for cleaning every single month. That’s overkill. How often should you actually do this? It depends on your water source. If you’ve got clear, shallow well water, you can probably go 12–18 months between deep cleans. If your water’s a little murky, has a lot of sediment, or runs through an irrigation system with mineral buildup? Shoot for every 6–9 months. And hey, if you notice your pump’s flow rate dropping, or it’s making a weird grinding noise when it starts up, that’s your sign to yank it early—no need to wait for the schedule.
Before we jump into the steps, let’s talk safety. This is a submersible pump, which means it’s hooked up to solar panels, so there’s electricity involved. I’ve learned the hard way to never skip these basics. First, turn off the solar system—unplug the charge controller if you can, or flip the main breaker to the solar array. We don’t want any accidental power surges while you’re working underwater or handling wires. Second, let the pump cool down for at least 30 minutes. It’s been running in warm water, and a hot pump can burn you, plus cold water hitting a hot pump might crack the motor housing. Third, grab your gear: work gloves (those intake screens are sharp!), a pair of waterproof boots, a bucket, and a screwdriver set (Phillips and flathead, depending on your pump model). No need for fancy stuff here—most of what you’ll need is probably in your garage already.
Okay, step one: remove the pump from the well or water source. This sounds simple, but there’s a right way to do it. Most solar submersible pumps are attached to a PVC or stainless steel drop pipe. Disconnect the pipe from the pump, and if it’s been in there a while, don’t yank it hard—rock it gently side to side to break any mineral buildup that’s holding it in. Once you have the pump out, set it on a flat, dry surface (not the grass, you’ll track dirt back onto it) and let any excess water drain out of the lines for a minute. Pro tip from my team: take a quick photo of how the wires and pipes are connected before you disconnect anything. Nothing worse than spending an hour cleaning and then staring at mixed-up wires when you try to put it back.
Now, the part that’s actually cleaning the pump—this is where most folks mess up. First, inspect the intake screen. That’s the little mesh cover on the bottom of the pump, designed to keep big debris (rocks, leaves, algae chunks) out of the motor and impeller. Over time, this screen clogs with fine sediment, mineral scale, and even tiny algae spores. If it’s super gunked up, don’t use a brush with hard bristles—you can tear the mesh. Instead, rinse it off with clean tap water. If the clog’s really stubborn, soak it in a bucket of warm (not hot) water with a drop of dish soap for 15 minutes, then gently scrub with a soft-bristled toothbrush. That’s all you need—no chemicals here, because dish soap is mild, and chemicals can damage the pump’s rubber seals over time.
Next up, the impeller. The impeller is the spinning part that actually moves water through the pump, and this is where a lot of performance issues come from. To get to it, you’ll need to unscrew the pump’s motor housing cover—again, check your pump’s manual (but for most of our models, it’s just a few small screws). Once you have the cover off, you’ll see the impeller: it’s that little plastic or metal wheel with curved blades. Here’s the science part: if sediment, mineral deposits, or algae build up on the impeller blades, they throw off the balance, so the impeller doesn’t spin as fast, which cuts your flow rate. If the impeller is just a little dirty, you can gently wipe it with a soft cloth and warm water. If there’s thick mineral scale (that white chalky stuff you see on faucets), soak the impeller in a 50/50 mix of white vinegar and water for 10–15 minutes. Vinegar is perfect for this—it dissolves calcium and mineral buildup without corroding metal parts or breaking down rubber seals. Don’t use apple cider vinegar, though—it has too much sugar and will leave residue. Stick with plain white distilled vinegar.
Wait, what about the motor housing? A lot of people want to scrub the outside of the motor, but hold up—the motor is sealed, right? Most modern solar submersible pumps have a hermetically sealed motor, so water shouldn’t get in. The only time you need to clean the motor housing is if there’s big debris caked on the outside, like mud from being dragged through dirt when you pulled it out. Just wipe it down with a damp cloth—never submerge the motor in water, even when it’s off. If your pump is older and the seal is a little worn, double check with a dry cloth; you don’t want water getting into the motor and shorting it out.
Now that you’ve cleaned the screen and impeller, let’s do a quick test before putting it all back together. Reconnect the power (just temporarily—we’re not putting it in the well yet) and hold the pump under a bucket of clean water. Turn the solar system on and let the pump run for 30 seconds. You should see a steady stream of water coming out of the outlet. If it’s sputtering, double check that the impeller is spinning freely, or that the intake screen isn’t still clogged. I can’t tell you how many times I’ve heard from a customer who put it back together, skipped the test, and then had to pull it out again because it wasn’t working. Save yourself the hassle—test now.
Once you’ve confirmed it’s working, it’s time to put it all back. Make sure the impeller is seated correctly in its slot—if it’s loose, the pump will make a grinding noise and burn out. Tighten the motor housing screws just enough—don’t over-tighten, because you can crack the plastic cover. Reconnect the drop pipe and wires using that photo you took earlier (no mixing up positive and negative wires—if you do, the pump might spin backward and push no water at all). Then, carefully lower the pump back into the well, making sure it’s sitting on a solid base (some wells have a gravel pad at the bottom, so set it there instead of on loose sand, which can get sucked into the intake).
Now, a few post-cleaning tips that’ll make your next way easier. First, if you’re dealing with really bad sediment, consider adding a pre-filter to your intake line. It’s a simple mesh filter that goes between the pump and the well, catches most sediment before it reaches your pump, and makes cleaning less frequent. We sell these as an add-on, and every customer who’s used one swears by it. Second, keep a log of when you clean the pump. Jot down the date, how long it took, and what you found (like “heavy sediment clog”)—that’ll help you spot patterns, like if your well is getting more sediment over time, so you can adjust your cleaning schedule. Third, if you notice that even after cleaning, your pump’s performance is still off, don’t panic—it might be a different issue, like a broken solar panel or a faulty charge controller, not the pump itself. Shoot us a message, and our tech team can walk you through troubleshooting.
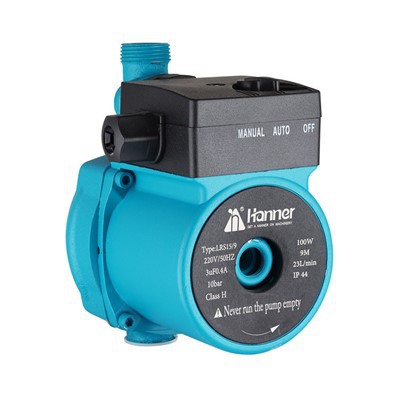
As a solar submersible pump supplier, my whole job is to make sure your water system works as long as possible. I’ve seen pumps run for 15+ years with regular cleaning, and I’ve seen ones die in 2 years because their owners skipped this simple step. Cleaning isn’t a chore—it’s how you protect your investment and keep your water flowing when you need it. If you’re not sure about any step, or you need help choosing the right cleaning supplies, or even adding that pre-filter I mentioned, reach out to our team. We work with farmers, homeowners, and small businesses all over, and we’re here to answer your questions, not just sell you a pump.
Domestic Pump Last thing: if you’re in the market for a new solar submersible pump, or you need parts, or you just want to chat about how to make your current setup work better, hit us up. We’re not the big box store that sends you a generic manual and disappears—we’re the team that cares about your pump, your well, and your water. No pressure, just a real person here to help.
References
- "Solar Submersible Pump Maintenance Guidelines." International Solar Energy Society, 2022.
- "Best Practices for Cleaning Submersible Pump Intake Screens." Ground Water Protection Council, 2021.
- "Effect of Mineral Buildup on Submersible Pump Performance." Journal of Water and Energy Management, vol. 15, no. 2, 2020, pp. 112-118.
Taizhou Hanner Machinery Co., Ltd.
Taizhou Hanner Machinery Co., Ltd. is one of the leading solar submersible pump manufacturers and suppliers in China. We warmly welcome you to wholesale hot selling solar submersible pump from our factory. All customized products are with high quality and competitive price.
Address: Southeast Industrial Accumulation, Songmen Town, Wenling City, Zhejiang, China
E-mail: kathy@cnhanner.com
WebSite: https://www.hannerpump.com/
